Kitchen remodeling
Organize Your Kitchen for Time-Saving Efficiency: Tips and Tricks
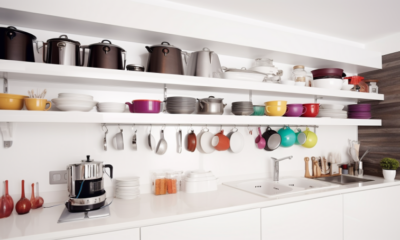
Organizing your kitchen can make a world of difference in how quickly and efficiently you can prepare meals. One way to save time is to group your kitchen tools and utensils by function and store them near where you use them. You can also use drawer dividers or trays to keep small items like spices and measuring spoons organized. Labeling your pantry and fridge can help you easily find ingredients and prevent food waste. Don’t forget to regularly declutter and clean out your kitchen to maintain an organized space. By taking the time to organize your kitchen, you’ll be able to spend less time searching for items and more time enjoying cooking and mealtime.
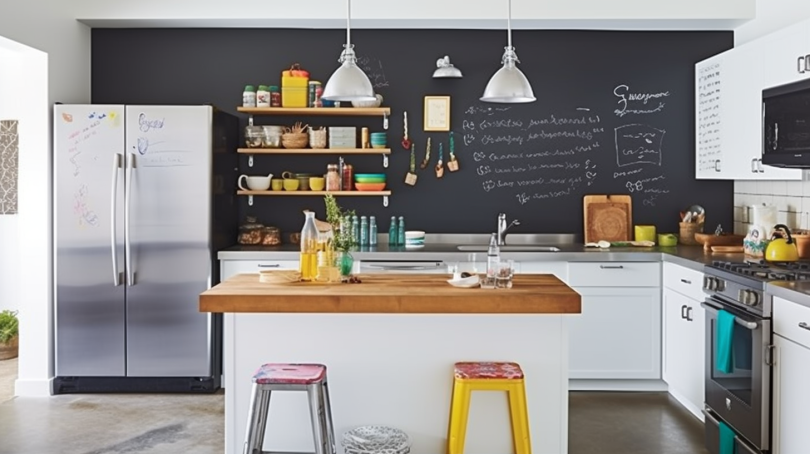
Welcome to our comprehensive guide on how to organize your kitchen for time-saving efficiency. As the heart of the home, the kitchen is often the busiest room in the house, and it’s essential to have a well-organized space to make meal preparation more manageable. By decluttering, streamlining your storage solutions, and implementing smart organization systems, you can transform your kitchen into a functional and efficient space that saves you time and reduces stress.
Step 1: Identify Areas That Require Organization
The first step in organizing your kitchen is to identify areas that require organization. Start by taking a look around your kitchen and making a list of areas that are cluttered or disorganized. Common areas that require organization in most kitchens include:
- Pantry
- Kitchen cabinets
- Kitchen drawers
- Kitchen counters
- Kitchen appliances
Once you have identified these areas, it’s time to move on to the next step.
Step 2: Remove Unnecessary Items
The second step in organizing your kitchen is to remove any unnecessary items. Go through each area of your kitchen and sort through items that you no longer need or use. Be ruthless when decluttering your kitchen – if you haven’t used an item in the past year, it’s probably time to let it go.
Consider donating any items that are still in good condition but no longer serve a purpose in your kitchen. You can also sell items online or at a garage sale to make some extra cash.
Step 3: Sort Items Into Categories
The third step in organizing your kitchen is to sort remaining items into categories. This will help you to keep similar items together and make it easier to find what you need when you need it. Some common categories include:
- Bakeware
- Cookware
- Dinnerware
- Utensils
- Food storage containers
Once you have sorted your items into categories, it’s time to move on to the next step.
Step 4: Implement Storage and Organization Systems
The fourth step in organizing your kitchen is to implement storage and organization systems. There are many different solutions available to help you organize your kitchen, including:
- Kitchen drawer organizers: These can help keep utensils, cutlery, and other small items in order.
- Kitchen cabinet organizers: These can help maximize space and ensure that all of your pots, pans, and dishes are easily accessible.
- Pantry organization systems: These can help keep your food items organized and easy to find.
- Kitchen counter organization solutions: These can help keep your countertops clutter-free and maximize space for meal preparation.
- Kitchen appliances storage solutions: These can help keep appliances like blenders, mixers, and slow cookers organized and out of the way when not in use.
Choose the storage solutions that work best for your needs and preferences. Remember that the goal is to create a functional and efficient space that saves you time and reduces stress, so choose solutions that will work well with your daily routine.
Step 5: Meal Prep for Time-Saving Efficiency
The final step in organizing your kitchen for time-saving efficiency is meal prep. By preparing meals in advance, you can save time and reduce stress during the busy workweek. Some meal prep tips include:
- Plan your meals for the week ahead of time
- Cook and freeze meals in advance
- Prep ingredients ahead of time
- Invest in quality food storage containers to keep your prepped ingredients fresh
By incorporating meal prep into your routine, you can save time and reduce stress during the busy workweek.
Kitchen Cleaning Tips
In addition to organizing your kitchen for time-saving efficiency, it’s also essential to keep your kitchen clean. A clean kitchen is not only more pleasant to work in but also helps reduce the risk of foodborne illness. Here are some kitchen cleaning tips:
- Clean as you go: Wipe down counters, wash dishes, and put away items as you use them.
- Deep clean regularly: Set aside time each week to deep clean your kitchen, including appliances, cabinets, and drawers.
- Use natural cleaning solutions: Avoid using harsh chemicals in your kitchen and opt for natural cleaning solutions like vinegar, baking soda, and lemon juice instead.
Conclusion
Organizing your kitchen for time-saving efficiency may take some effort upfront but will pay off in the long run. By decluttering, streamlining storage solutions, implementing organization systems, and meal prepping, you can transform your kitchen into a functional space that saves you time and reduces stress. Remember to keep your kitchen clean to maintain a healthy cooking environment.
We hope that this guide has been helpful in providing you with practical tips and tricks for organizing your kitchen. Happy cooking!


Kitchen remodeling
10 Practical Tips for Effortlessly Organizing Your Tupperware.
If you’re tired of constantly sifting through a mess of mismatched Tupperware containers, it’s time to get organized. With a few simple tips, you can easily streamline your storage system and keep your food containers easy to find and use. First, clear out any items you no longer need and invest in a few versatile sizes of containers. Then, group similar items together and designate a specific area for storing Tupperware. Consider using drawer dividers or shelf risers to maximize space and keep everything tidy. Finally, don’t forget to label your containers to make them easy to identify at a glance. With these tips, you’ll be able to easily find and use the perfect container for any meal or snack.
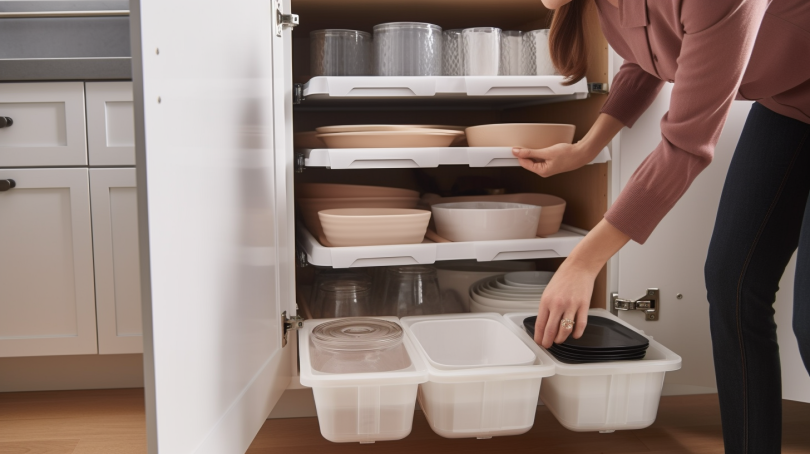
Do you ever find yourself rummaging through your kitchen cupboard, searching for the right Tupperware lid, or struggling to fit all your containers in a limited space? If so, you’re not alone! Organizing Tupperware can be a daunting task, but with the right tips and tricks, it can be effortless. Here are ten practical tips for effortlessly organizing your Tupperware:
1. Sort by Size and Shape
The first step to organizing Tupperware is to sort it by size and shape. This way, you can easily match lids with containers and stack them neatly. Consider investing in a set of nesting containers that take up less space and are easier to organize.
Pro tip: Use drawer dividers or small bins to separate lids from containers and keep them organized.
2. Use a Storage System
A storage system can help you maximize space and keep your Tupperware organized. Consider using a pull-out drawer or shelf organizer specifically designed for storing food containers.
Pro tip: Label each container with its contents and expiration date to avoid confusion.
3. Declutter Regularly
Decluttering regularly is crucial to maintaining an organized kitchen. Go through your Tupperware collection every few months and get rid of any containers without matching lids or those that are cracked or stained beyond repair.
Pro tip: Donate any usable containers to charity organizations or repurpose them for non-food storage purposes.
4. Invest in Space-Saving Solutions
If you have limited space in your kitchen, consider investing in space-saving solutions such as collapsible containers or stackable sets that take up less room when not in use.
Pro tip: Use vertical space by installing a hanging rack or shelf for storing Tupperware lids.
5. Store Like with Like
Storing like with like means keeping similar items together. This way, you can easily find what you need without having to search through multiple containers.
Pro tip: Store all your baking supplies together, such as measuring cups and spoons, mixing bowls, and baking dishes.
6. Keep a Lid on It
Lids are often the most challenging part of organizing Tupperware. To keep them organized, store them separately from containers and use a lid organizer to keep them in place.
Pro tip: Use clear plastic bags to store lids for each container size to prevent them from getting mixed up.
7. Stack Smartly
Stacking Tupperware can save space but can also lead to chaos if done haphazardly. Stack containers of the same size and shape together, with the largest at the bottom and smallest at the top.
Pro tip: Use shelf risers or wire baskets to create additional layers for stacking Tupperware.
8. Sort by Frequency of Use
If you have limited cupboard space, consider sorting your Tupperware by frequency of use. Keep frequently used containers in an easily accessible location and less frequently used ones in harder-to-reach areas.
Pro tip: Consider using a lazy Susan or turntable for easy access to hard-to-reach items.
9. Create Zones
Create zones in your kitchen cupboard or pantry specifically dedicated to storing Tupperware. This way, you can easily find what you need without having to dig through other items.
Pro tip: Use adhesive labels or chalkboard paint to label each zone for easy identification.
10. Don’t Overdo It
Finally, don’t overdo it when it comes to Tupperware organization. Keep it simple and practical, and don’t stress over minor imperfections or mistakes.
Pro tip: Remember that the ultimate goal of organizing Tupperware is to make your life easier, not add more stress to it.
In conclusion, organizing Tupperware can be a straightforward and effortless task with the right tips and tricks. By sorting by size and shape, using a storage system, decluttering regularly, investing in space-saving solutions, storing like with like, keeping a lid on it, stacking smartly, sorting by frequency of use, creating zones, and not overdoing it, you can keep your Tupperware collection organized and your kitchen clutter-free.
Kitchen remodeling
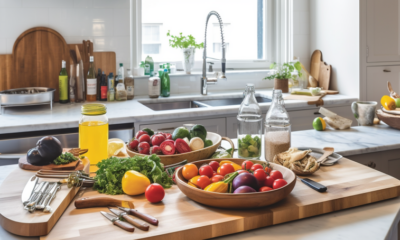
10 Practical Tips for Efficiently Organizing Your Kitchen for Meal Prep
Organizing your kitchen for meal prep is essential for a stress-free and successful cooking experience. Start by decluttering and getting rid of any unnecessary items. Then, create designated areas for each type of ingredient, such as a pantry for dry goods and a refrigerator drawer for produce. Utilize storage containers to keep everything organized, and label them for easy identification. Consider investing in kitchen appliances, like a slow cooker or pressure cooker, to save time and simplify your meal prep process. With a well-organized kitchen, you’ll be able to whip up healthy and delicious meals in no time.
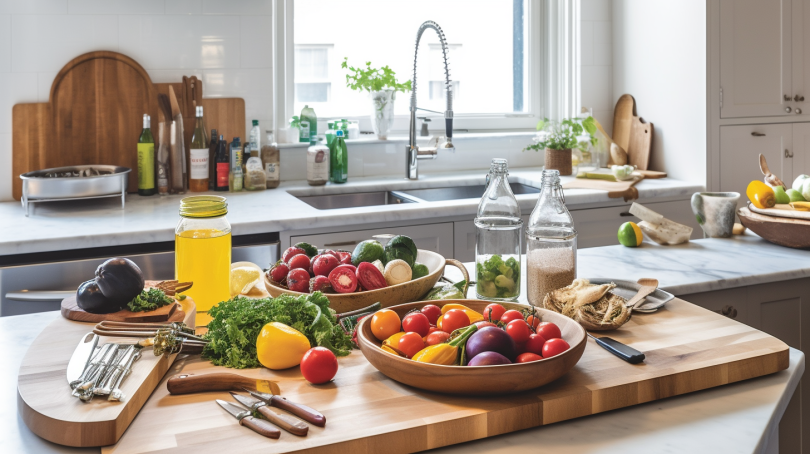
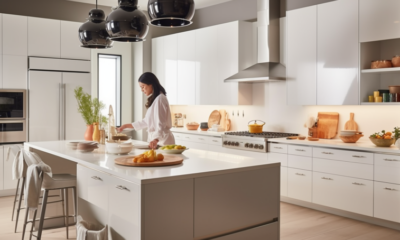
Welcome to our guide on 10 practical tips for efficiently organizing your kitchen for meal prep! Meal preparation is an excellent way to save time and money while ensuring that you eat healthy, homemade meals throughout the week. However, it can be challenging to do meal prep effectively if your kitchen is disorganized and cluttered.
The primary keyword for this topic would be “organize kitchen meal prep,” and we will cover several other keywords such as “kitchen storage, kitchen organization, meal planning, kitchen cabinets, pantry organization, kitchen shelves, refrigerator organization, kitchen counter space, kitchen utensils storage, and kitchen appliance storage.”
If you’re struggling with finding enough counter space or running out of room in your fridge or pantry, don’t worry! We have ten practical tips that will help you organize your kitchen for effective meal preparation.
1. Start With a Plan
The first step in organizing your kitchen for meal prep is to make a plan. Decide on what meals you want to prepare for the week and make a grocery list accordingly. Having a plan in place will help you save time at the grocery store and prevent food waste by only buying what you need.
2. Declutter Your Kitchen
Before you start organizing your kitchen, decluttering should be your first step. Remove any items that are expired or no longer needed. You can also donate unwanted items to charity or sell them online if they are still in good condition.
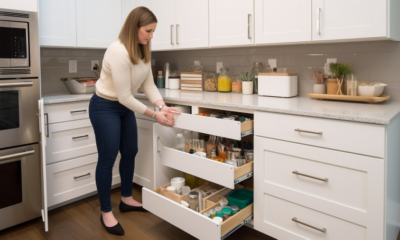
3. Optimize Your Kitchen Cabinets
Kitchen cabinets are essential for storing dry goods like pasta, rice or canned foods. To optimize this space, use clear containers or jars with labels to keep everything organized and easily accessible.
4. Organize Your Pantry
Organizing your pantry is crucial for efficient meal prep. Use shelf risers to maximize space, and group similar items together. For example, place baking ingredients, such as flour and sugar, on one shelf and canned goods on another.
5. Maximize Your Fridge Space
Maximizing your fridge space is essential for storing fresh produce, prepped meals, and condiments. Use clear containers to store fruits and vegetables and label them accordingly. You can also use a lazy Susan to store condiments or small jars of pickles or olives.
6. Utilize Your Freezer
Your freezer is an excellent tool for meal prep as it allows you to cook in bulk and freeze leftovers for later. Use freezer-safe containers or bags to store prepped meals or leftovers, and label them with the date so you can keep track of what needs to be eaten first.
7. Invest in Kitchen Shelves
Kitchen shelves are an excellent way to add storage space to your kitchen without taking up too much room. Install shelves above your sink or stove to store cookbooks, spices, or oils.
8. Create More Counter Space
If you’re struggling with limited counter space, consider investing in a kitchen island or cart that can be moved around as needed. You can also use a cutting board over your sink to create more workspace when cooking.
9. Organize Your Utensils
To keep your utensils organized, use a drawer organizer or hang them on a magnetic strip on the wall. This will not only keep everything in its place but also make it easier to find what you need when cooking.
10. Store Appliances Efficiently
When not in use, store your appliances, such as blenders or slow cookers, in a cupboard or on a shelf to keep them out of the way. You can also use an appliance garage to store frequently used appliances on your counter.
Conclusion
Organizing your kitchen for meal prep doesn’t have to be a daunting task. With these ten practical tips, you can make the most out of your kitchen space and save time and money on meal preparation. Remember to start with a plan, declutter your kitchen, and optimize your storage space using shelves, clear containers, and labels. By following these tips, you’ll be able to create an efficient and practical kitchen where you can comfortably prepare meals.
Kitchen remodeling
5 Practical Tips for Efficiently Organizing Your Cooking Utensils
Organizing your cooking utensils can make your kitchen look more tidy and efficient. One way to do this is by grouping utensils by type and size, using drawer dividers or utensil holders. Another tip is to declutter and only keep the utensils you use regularly. Hang utensils on a wall or on a magnetic rack to free up drawer space. Additionally, consider incorporating space-saving solutions like stacking bowls and nesting measuring cups to further maximize storage. By organizing your cooking utensils, you’ll have a more streamlined and functional kitchen for all your culinary adventures.
Welcome to the ultimate guide on how to efficiently organize your cooking utensils! Cooking is an art, and it requires the right tools to create delicious and savory dishes. But with so many different types of utensils available, it can be challenging to keep them organized and easily accessible. Messy drawers or cluttered countertops can make it difficult to find what you need quickly and can even discourage you from cooking altogether.
Fortunately, with a little organization and planning, you can keep your kitchen tidy and streamline your cooking process. In this tutorial, we will provide you with five practical tips for organizing your cooking utensils that will help you save time, reduce clutter, and make your kitchen more efficient.
TIP #1: Use a Utensil Holder
One of the simplest ways to organize your cooking utensils is by using a utensil holder. A utensil holder is a container that holds all of your kitchen tools in one place, making it easy to access them when needed. You can choose from a variety of materials such as ceramic, metal, or plastic depending on your preference.
If you have limited countertop space, consider using a wall-mounted utensil rack that can be installed on the wall near your stove or range. This will free up valuable counter space while keeping your utensils within reach. Alternatively, you may also use a utensil caddy that can be carried around easily from one place to another.
To maximize space inside drawers, use drawer organizers that are specifically designed for kitchen tools. These organizers come in various sizes and shapes that fit perfectly in most standard-sized drawers.
TIP #2: Group Similar Utensils Together
Grouping similar utensils together is an excellent way to keep them organized and easily accessible. For example, store all of your spatulas, whisks, and spoons in one compartment or holder. Similarly, you can keep all of your cutting boards and knives together in a designated area.
By grouping similar utensils together, you will be able to find what you need quickly and efficiently. It also makes it easier to put things away after use, reducing clutter and mess.
TIP #3: Keep Frequently Used Utensils Within Reach
It’s essential to keep frequently used utensils within reach to save time and reduce frustration. Place the utensils that you use most often near your stove or range where you can easily grab them while cooking. This includes spatulas, spoons, tongs, and any other tools that you use daily.
For less frequently used utensils like baking tools or specialty items such as a garlic press or zester, store them in a separate drawer or container away from your primary workspace. This will help declutter your cooking area while still keeping these tools within reach when needed.
TIP #4: Utilize Vertical Space
When it comes to organizing your kitchen space, don’t forget about vertical storage options. Wall-mounted racks are an excellent option for storing pots and pans, baking sheets, and other bulky items that take up too much drawer or cabinet space.
You can also use hooks to hang utensils like ladles or skimmers on the wall or under cabinets. This is a great way to keep these tools within reach while freeing up valuable drawer space.
TIP #5: Regularly Declutter Your Kitchen Utensils
Finally, it’s essential to regularly declutter your kitchen utensils to avoid accumulating unnecessary items that take up valuable space. Go through your utensil collection every few months and get rid of anything that you no longer use or need.
Consider donating items that are still in good condition to a local charity or thrift store. This will not only help declutter your kitchen but also benefit someone else who may need these items.
Conclusion
Organizing your cooking utensils doesn’t have to be a daunting task. By using the tips we’ve shared in this tutorial, you can create a functional and efficient workspace that makes cooking easier and more enjoyable. Remember to use a utensil holder, group similar utensils together, keep frequently used utensils within reach, utilize vertical space, and regularly declutter your utensil collection.
With these practical tips, you’ll be able to keep your kitchen tidy and organized while streamlining your cooking process. Happy cooking!
-
home renovation3 years ago
Step-by-Step Guide: How to Replace a Doorknob for Beginners
-
home renovation3 years ago
Setting Up a Smart Home System: A Step-by-Step Guide
-
Home improvement financing3 years ago
Understanding Clean Energy Loans: Benefits and Eligibility Requirements
-
home renovation3 years ago
Sealing Drafty Windows: A Step-by-Step Guide to Keep Your Home Comfortable and Energy-Efficient
-
home renovation3 years ago
How Smart Home Technology Influences Energy Consumption: A Comprehensive Analysis
-
home renovation3 years ago
10 Best Smart Home Gadgets and Technology for a Modern Lifestyle
-
home renovation3 years ago
The Future of Smart Home Technology: Unlocking the Potential of Home Automation
-
home renovation3 years ago
The Disadvantages of Smart Home Technology: Exploring the Drawbacks